Sunday, February 16, 2014

Three B's Complete!

Super proud of myself for starting, and completing a project in such a short amount of time! 
 
Okay, now that the roar of accolades has died down and I can hear myself think, I will share a bit of the finishing of this bookcase. 
 
 
We wanted color.  Color we got!  I used latex paint as a color/stain.  Wipe on full strength and wipe off, revealing the wood grain with the color applied. 
 
 
After allowing the paint to dry about 2-4 hours, I lightly sanded with 320 grit sandpaper to wear the paint some, showing off more grain and some bare wood.  I used a clean rag to clean the dust off and I also rubbed the surfaces very vigorously with the cloth, burnishing the wood some.  It really smoothed out the surface and had a light satin sheen to it.  
 
 
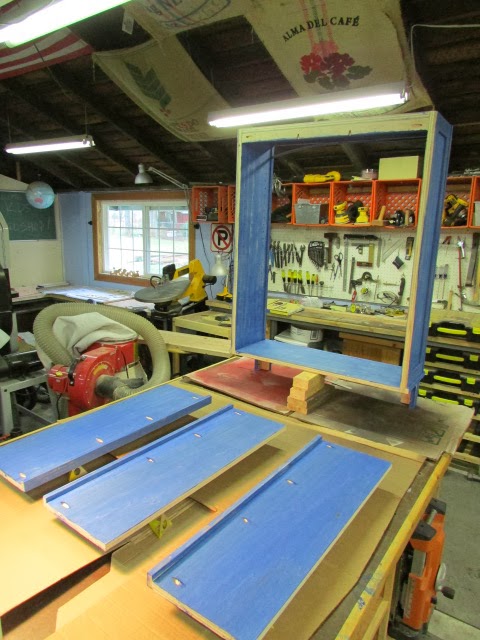
Here is everything laid out to spray the finish.  It is a bookshelf going in a bedroom with three little boys so a top coat of protection is a DEFINITE MUST!
 
 
This is the spray finish that I used.  It came out perfectly.  I used 2 cans to cover the whole project at least 3 times.
 
 
Three coats later and some time to cure, here it is!  It is not a free standing bookshelf.  It is attached to the wall with screws.
 
 
Here is what I did to cover the end grain of the top.  I cut a piece and screwed it in place.  I plugged the screw holes.  I actually like that you can see the plugged holes when I sanded the ends.
 
 
You can see here that there are only two legs.  It leans against the wall and the bottom clears the top of the baseboard trim.  It is secured to the wall studs with screws at the top of the case.
 
 
Showing the arched corner detail here.  The piece is wedged into place and pinned into the top of the face frame along the middle.  If you look closely, you can see a screw securing the bookshelf to the wall.  Look at the top right corner of the "Little Blue Truck" book to see the screw.
 
 
This shows the sheen of the finish.  Very pleasing!  The top is screwed to the case with 5 screws up through the top of the case into the bottom of the top. 
 
 
Now it is all loaded up and ready to get disorganized!  I made three adjustable shelves for it but only needed two.  Better to have too many than not enough.
 
Thanks for reading!
 
First part of this project here!

Wednesday, February 12, 2014

Airgun Stock is Complete!

This stock is for a Beeman R9 air rifle.  It is a re-branded Weihrauch HW 95 Luxus.  Same rifle, different stamp.  This stock will be going to a friend.
 
This was a fun and challenging project all in one.  I am glad to say that it is finished except for some deglossing of the sheen on the finish.  I want to let it cure some before I start to rub it with steel wool.  I am trying for a satin finish.
 
This is one of my woodworking goals completed for this year! 
 
Thanks for looking!


Monday, February 10, 2014

Three B's

Building a
Bookself for the
Boys!

We started to try and organize the little boys room a while back.  It has been a process!

Three boys in one bedroom, 6 years old and under, creates a challenge just keeping toys and books picked up.  This next project in the ongoing task of organizing is a bookshelf.  A very much needed bookshelf!

This sort of jumped ahead in my wood project planning for this year.  That's OK though, it is one of those immediate attention things that needs to be taken care of.  It has been put off for too long!

The construction is pretty simple, plywood carcass trimmed out to look like it was built with more traditional methods.  I used a lot of pocket hole (KREG) joinery in this. 

The shelf will look like a free standing bookcase except no feet in the back.  It will rest up against the wall and will be secured to the wall with screws.  I will leave the back open and the painted wall will be the back of the cabinet.  I chose to do it this way to save material and time.
 
I used the hand-held circular saw and a homemade guide to cut the 3/4" thick material to width.  The pieces were cut to length with the sled on the table saw.  The sides, top, bottom and three shelves were cut this way.  The dimensions were figured by measuring the space where the shelf will be installed.  It has to fit with in two doorways and below some chair rail trim on the wall. 
 
 
Four sides and the long piece for the shelves.  I didn't cut the shelves until I had assembled the carcass pieces so I could get a precise measurement.  It was basically the width of the top or bottom pieces minus 1/8".
 
 
I used the can for the radius for the leg cutout. 
 
 
Here it is cut out with a jigsaw.
 
 
Pocket holes drilled in the top and bottom.  The hole will be located on the outside of the carcass.  The top holes will be covered by a laminated wood top and the bottom will be on the bottom of the case and they won't be visible unless you get on the floor and look underneath.
 
 
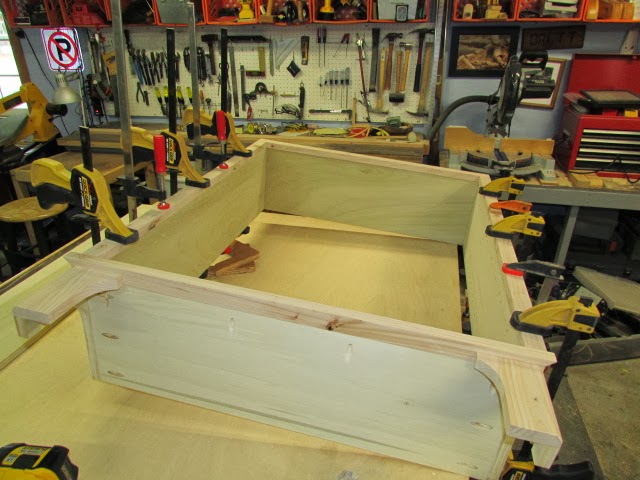
Four sides assembled to make the case.
 
 
Used a Rockler Shelf Pin Jig to drill the holes for adjustable shelving.
 
 
Laminated top all glued and clamped together.  I used 2x4 material for the top and trim pieces.  This project used about 2/3 of a sheet of 3/4" thick poplar plywood ($45) and about 3 8' 2x4s ($8).  I will use some paint and polycrylic finish to add color and protection.  I bought a 1 qt paint sample from Miller Paint Co. for $5 and the 1 gal. Minwax Polycrylic I had purchased for a previous project.  It was around $40.  If you total everything that's $98.  The leftover paint, finish and plywood will be used for other projects so all of the costs shouldn't be totaled into this one project.  But still, for a custom bookcase, $100 isn't too bad. 
 
 
Some of the leg detail with trim on the bottom and faces.
 
 
The bottom front trim piece cut.
 
 
With the side trim piece fit.
 
 
Pictured here with the face frame in place.
 
 
I had a couple of Opps in the project so far.  Both were from using the pocket hole screws.  This is one of them.  The leg front it attached to the side leg piece with pocket holes.  I chamfered the corner of the leg to soften the edge and add some detail.  When I drove the screws in, the tips just barely came through.  I backed them out and ground the tips off with a bench grinder and drove them back in. 
 
 
The other Opps was attaching the front trim piece to the bottom of the case.  I got the screw started crooked in the pocket hole and it drove through and came out the edge of the trim piece.  You can see the small broken piece of wood there along the seam between the two.  Not a huge deal and it won't even be notices once finished and in place filled with books.
 
 
Just showing off some of the pocket holes and how they were located to join the pieces.
 
 
The join between the front and side of the legs.
 
 
Face frame glued and clamped in place.
 
 
I thought that case looked a bit plain so I cut a thin piece to form and arch on the top of the case with open corners. 
 
 
I found a nice straight grained 2x4 and resawed that on the table saw to make the trim for the side panels.  They are glued and clamped in place. 
 
 
Here is what the joints look like close up.  I am very pleased with how it looks!
 
 
These are pieces that are glued to look like a frame and panel side.
 
 
Three shelves with edging attached with pocket holes.
 
 
From the side.
 
 
This is the inside of the case along the top.  It's a 3/4" thick piece of plywood secured to the top and the sides.  I will screw through this strip into the studs in the wall to secure the bookcase.
 
 
Sides with trim glued on to look like a frame and panel.
 
 
Leg and corner details.
 
 
Arch and top corner details.
 
 
Top arch.
 
 
Overall look.  I still have some sanding to do and I think I may do bread board ends on the top to cover the end grain.  The top overhang will get cut back some and I may chamfer the bottom edge of the top. 
 
Next will be painting and finishing the bookcase.  I need to do some testing first before I proceed on the finished piece. 


Monday, February 3, 2014

Woodturning a Mini Cake (Cupcake) Stand


Mrs. P likes to take pictures with her camera.  She belongs to an online group that has photo themes where they have a subject like, clouds, and the members that want to participate, turn in a photo that fits the theme title and then they get to vote on the ones they like best.  A winner is determined and everybody has a good time sharing their photos with the group. 
 
One of the themes coming up is a "sweets" theme.  Mrs. P wanted to make a cupcake and decorate it really fancy and take a picture of that for her entry.  She came up with the idea of a small stand to display the cupcake on for the photo. 
 
Of course, who does she go to for such a thing as a cupcake stand?  That's right, her knight in shining armor.  Since he wasn't there, she came and asked me if I could turn one on the lathe for her!  Ha ha 
 
Here is the process that I went through to come up with this cute little stand.
 
 
First I selected the material I was going to use.  I chose some madrone that I had.  
 
 
 Next I cut it to length and ripped the column to width.  You can see how the three pieces will go together in the finished piece.
 
 
I used the screw in the chuck to mount a waste block to.  I had to get another piece to stack with it because it wasn't thick enough to true the face without running into the screw.


Trued up with extra spacing behind it.
 
 
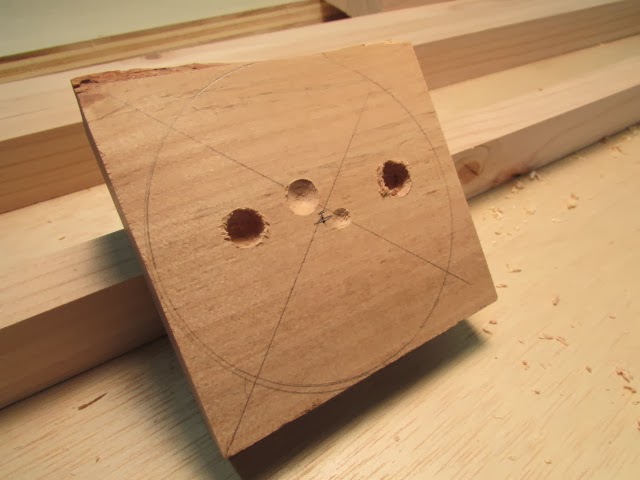
Top tier with center marked and then I cut the circle out so there was less wood to cut away at the lathe.
 
 
Top tier hot glued to the waste block and the tailstock brought up to the work piece for support.


The work piece trued and revealing a check in it. 
 
 
I hit it with some thin CA glue to keep it together.
 
 
Next, I cut a mortise into the bottom of the top to reverse mount in the chuck by expanding (opening) the jaws.
 
 
I drilled a 3/8" hole to receive the tenons of the column that I will turn later.


I removed the work piece and the waste block and separated them by prying them apart.  Man that hot glue sure does hold well!  You can see the wood from the waste piece that broke off when prying them apart.
 
I guess I forgot to get some pictures of the next step but I did true the piece after mounting with the jaws.  I turned to shape and burned a couple of lines around the bottom edge for detail.


On to the foot of the stand.  It was pretty simple.  I did a friction fit between the chuck jaws and the live center.  I trued it up and turned a mortise to reverse it for the jaws to hold on to again.
 
 
Here it is reversed and turned to shape.  When the lathe stopped, I discovered the edge had torn out some.  On to plan "B".  
 
 
I finished turning the top side of the foot and drilled a 3/8" hole that will receive a tenon on the column.
 
 
I had this waste piece left over from a previous project and used it to reverse mount the foot using the hole.
 
 
Mounted and ready to bring the tailstock up for support.
 
 
Supported and ready for action!
 
 
Removed the broken edge.
 
 
Used light cuts here to remove the extra support material.  Only the friction of the dowel was holding it together.
 
 
The completed foot.
 
 
The column mounted between centers.
 
 
Turned true.
 
 
I started with turning two 3/8" tenons on each end that will go into the holes that were drilled in the top tier and the foot.


Here is the final shape of the column.
 
 
I glued the pieces together with some CA glue and finished with 2 coats of spray finish.  Can't wait to eat those cupcakes!